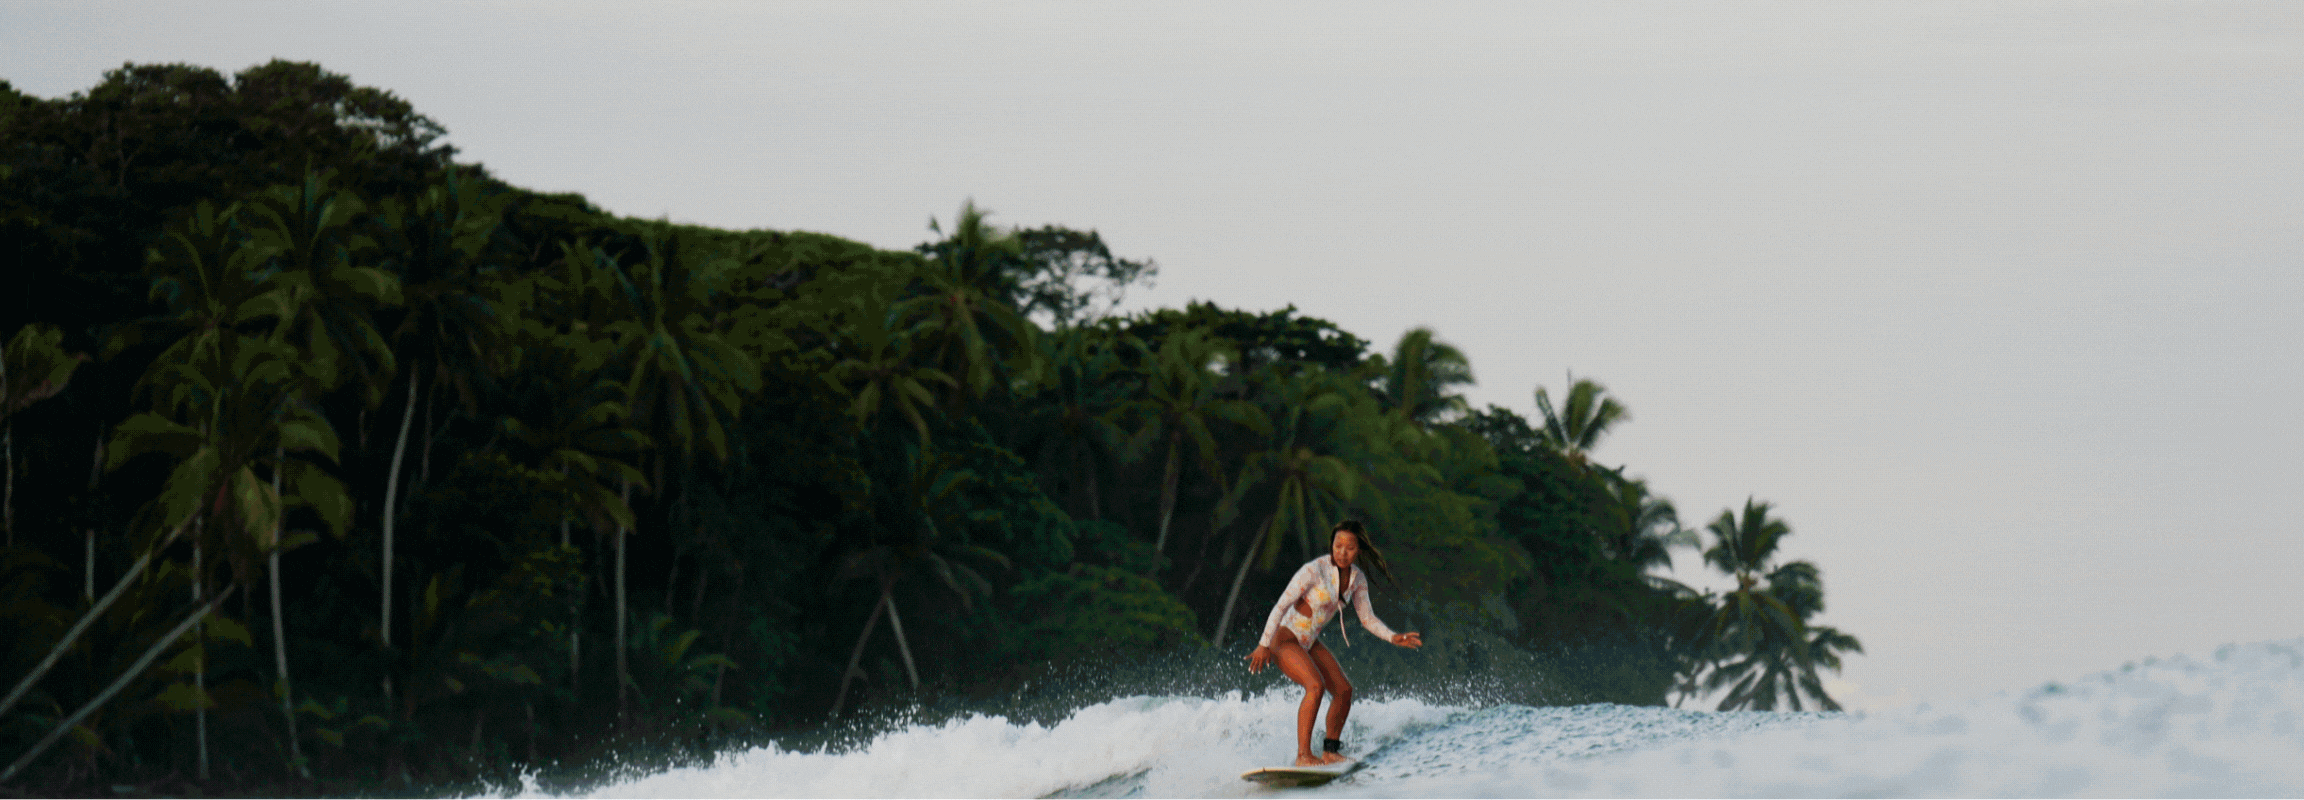
With the holidays fast approaching, ’tis the season to find gifts for the special people in your life, especially your surf buddies! From stylish surf gear to eco-friendly essentials, here’s a curated list featuring some of the best brands to keep surfers stoked this holiday season.
1. SWA Online Membership – Year Subscription
For surfers who are always looking to improve, an annual membership with Surf with Amigas Online is a perfect choice. SWA provides access to a treasure trove of online courses, coaching sessions, and technique tutorials, as well as workouts, yoga classes, nutrition, and female-centric surf storytelling. This membership is ideal for surfers who want to boost their skills, stay fit between SWA retreats, and learn more about surf and movement theory while joining a bad-ass community of women surfers. A gift of an SWA Online membership will gift a special someone a whole year of progression and encouragement.
Gift Idea: Print out the membership confirmation and pair it with a small surf-themed notebook so they can jot down notes and tips they learn!
2. Seea – Stylish and Sustainable Surfwear
Seea is known for its beautiful, eco-friendly surfwear designed specifically for women in waves. Their pieces blend fashion and functionality with flattering cuts, vibrant colors, and sustainable fabrics. From high-waisted bikini bottoms to full-coverage surf suits, Seea’s designs let surfers paddle out with confidence and style. Their products are also ethically manufactured, making them a perfect gift for the surfer who loves both fashion and the planet.
Gift Idea: Surprise them with a Seea surf suit or bikini in a bold pattern that’ll make them stand out in the lineup, or a gift card so they can choose their own favorites!
3. Salt Gypsy – Performance Apparel for Women Who Shred
Salt Gypsy is an Australian brand that caters to female surfers looking for cute, durable surfwear designed to withstand the elements. From stylish surf leggings and rashies to cozy hoodies, Salt Gypsy focuses on functionality with flair. Known for high-quality gear that supports female surfers’ needs, their products are perfect for year-round surfing adventures. Salt Gypsy is also committed to eco-conscious practices, using recycled materials wherever possible. What’s more, they even sell boards! Check out their new line of surfboards here!
Gift Idea: A pair of Salt Gypsy surf leggings or a stylish rash guard makes a great gift for any surfer who loves to ride in style while staying sun-safe.
4. Mad Hippie – Natural Skincare Essentials
Long days in the sun, salt, and sand can take a toll on a surfer’s skin, making a Mad Hippie skincare set a thoughtful gift. Known for their cruelty-free and natural products, Mad Hippie offers skincare that’s gentle yet effective. From their Vitamin C Serum for brightening and repairing to their lightweight, mineral-based sunscreens, these products help surfers keep their skin healthy and protected from the elements.
Gift Idea: Put together a personalized skincare bundle with Mad Hippie’s Vitamin C Serum, facial moisturizer, and mineral sunscreen.
Kaiola has pioneered the perfect surf hat. Gone are the days of loose, vision-blocking hats in the lineup. Kaiola’s mission is clear: a hat that provides lasting protection from sun, glare, splashes and spray, fit for purpose in all wave conditions with plenty of stylish designs including bucket hat, visor and baseball cap! Not to mention they’re made from sustainably sourced, small-batch materials.
Gift Idea: Create a gift pack with one of the must-have Kaiola hat styles, plus other surf essentials like wax, leashes, etc.
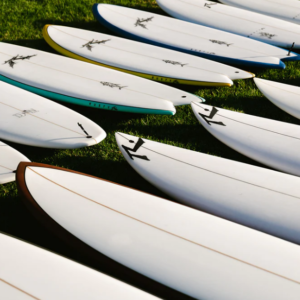
6. Rusty Surfboards – The Ultimate Custom Ride
For any surfer ready to embark on a journey with a new surf sled, a board from Rusty Surfboards is the ultimate gift. Rusty offers a range of boards for every wave condition, from high-performance shortboards to smooth-gliding longboards. Known for their innovative designs and exceptional craftsmanship, Rusty surfboards are built to perform! Plus, Rusty’s custom board options let you tailor the design to a surfer’s specific style and preferences, making it a truly personal and memorable gift.
Gift Idea: Surprise someone with a gift certificate toward a Rusty surfboard, or go the extra mile by ordering a custom board with their favorite color, artwork, etc.
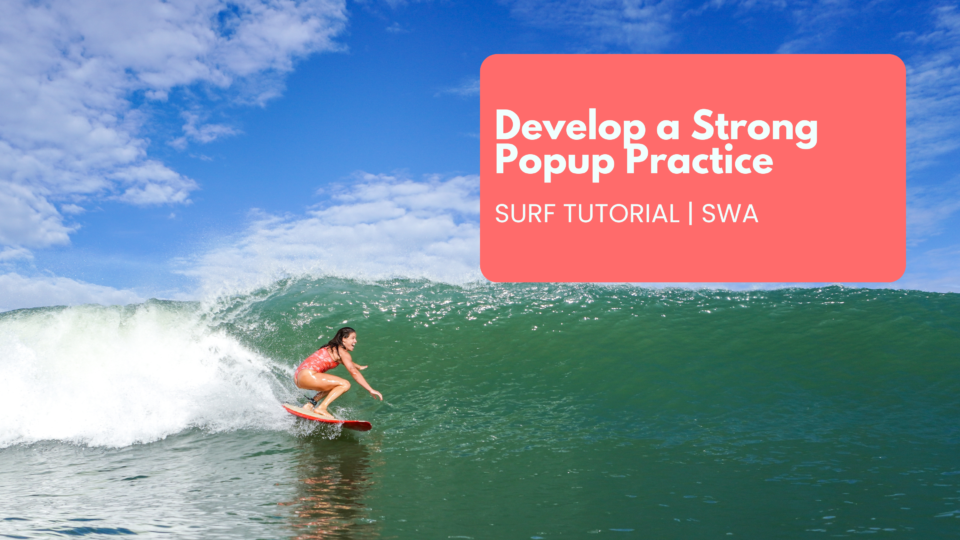
In this video tutorial Surf With Amigas Founder Holly Beck takes a holistic approach on how to develop an at-home popup practice.
In addition to learning all about different popup techniques + modifications, Holly will teach you an effective “reverse popup” technique that will help you target and ease physical limitations that you may feel in YOUR BODY while popping up.
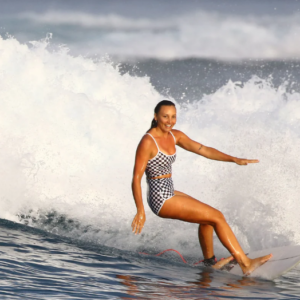
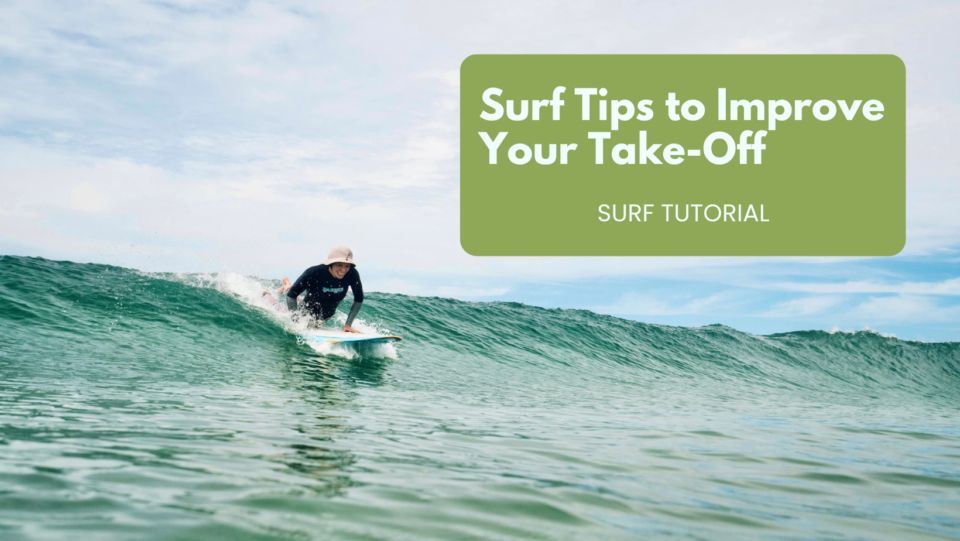
After any surfer learns how to take off and drop into green waves, the next logical skill to learn is how to surf down the line. But, as we all know, learning how to go down the line and surf on the open faces of your waves is not as easy as it sounds.
If you are dropping in, getting stuck behind in the white wash, and are unable to reach the open faces of your waves, this tutorial is for you!
We hope this tutorial helps you rack up your number of epic down-the-line waves! As always, if you have more video tutorial requests, contact us here.
We know its not as simple as it sounds, so here we are. We encourage you to play around with these techniques. Consider how your board feels different under your feet each time you try something new, and practice, practice, practice.
The tail (back end) of the surfboard is the point where the board pivots and turns. If your stance is in the middle of your board and your back foot isn’t placed on the tail pad, you may notice that the board feels stiff and difficult to turn. If you don’t usually get your foot all the way back there, just start here! Practice this. Notice how the board starts to respond differently. Just get used to placing your foot back there, then move on to step 2.
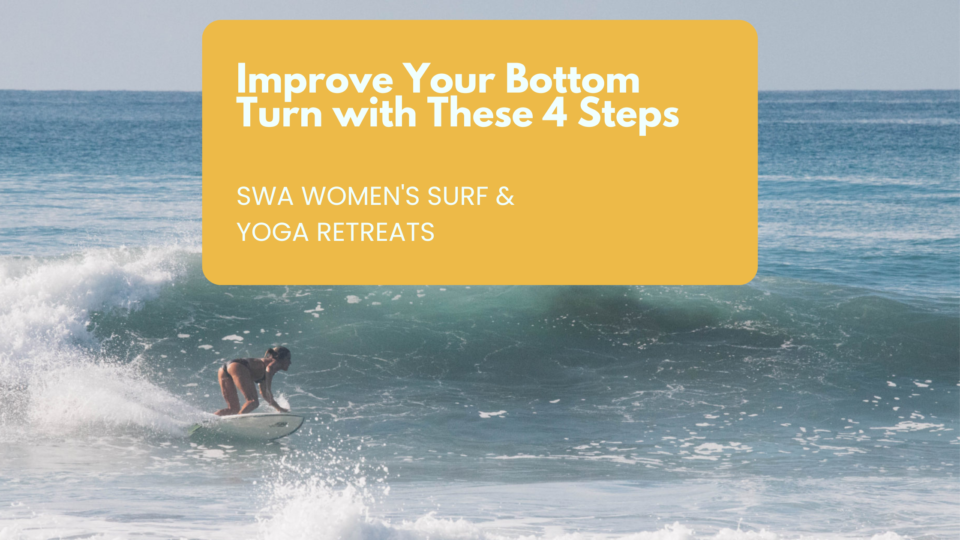
Position yourself at the bottom of the wave
Mid-wave bottom turns just aren’t as good. Why? If you’re already halfway up the wave, there’s not much space to really set up for a good turn! The best a mid-wave bottom turn will ever produce is an average horizontal cutback. Try to get speed and pump yourself down to the bottom of the wave to set up for the bottom turn. This will ultimately give you more space on the wave to work with and result in a bigger, better maneuver.
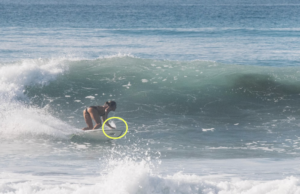
Touch the wave with your inside hand/fingertips
Once you’re positioned at the bottom of the wave, try to reach your inside hand or fingertips down to touch the wave. This will automatically pull your chest down closer to the wave and get you in a lower stance. It also creates a pivot point on the wave. Creating this pivot point will not only give you more control, but will help direct the nose of your board more vertically up the wave. Getting the hang of this is seriously a game-changer! When you try it out you’ll know what I mean. It may be a technique that you’ve never even noticed before, but after reading this I encourage you to go watch a few surf videos (of short boarders) and you’ll notice that talented surfers do it on almost every single wave.
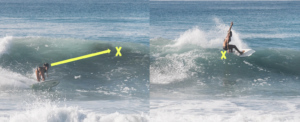
Look up (or ahead) at the section on the wave that you want to go to
The momentum from your bottom turn needs to take you somewhere! As you reach your inside hand into the water you should already be looking up (or ahead) at the part of the wave you’d like to go to. The purpose of a bottom turn is ultimately to set up for a barrel, snap, or cutback. Keep this in mind and keep your eyes on the prize as you set it all up.
We hope this 4 step guide to improve your bottom turn is helpful and encouraging. If you try out these techniques and they work for you. CLICK HERE to watch our full video breakdown!
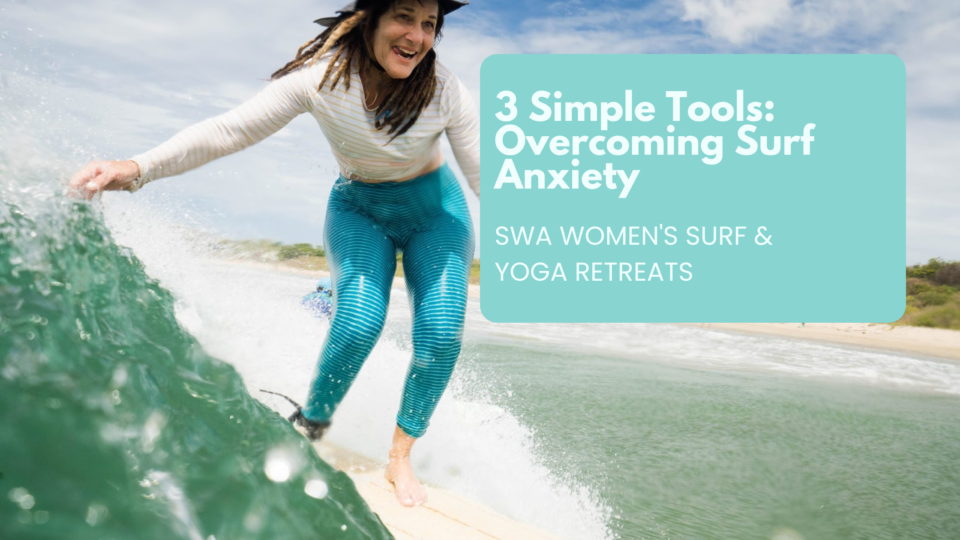
Standing on the beach and watching the waves with butterflies going crazy in your stomach. Paddling halfway to the outside only to turn back around out of fear or anxiety. Or making it to the outside but then feeling too far out of your comfort zone to catch any waves.
Here are three tools that may help you overcome anxiety in the ocean so you can tap into the joy of surfing and catch more waves.
Surf with friends (aka, surf with amigas!)
So much pressure is taken off when there’s a familiar face in the water. Surfing with friends means that someone can keep an eye on you, while you keep an eye on them. It also means that you can encourage each other to catch waves, cheer each other on, and laugh at the wipeouts together. Wiping out without a friend close by just isn’t the same. If you can’t line up a surf session with a friend, the next best thing you can do is chat with another surfer in the water. This will immediately take the edge off. Not to mention your new buddy will also be more likely to share a few waves with you!
Spend time swimming and playing in the ocean
Surfing comes with many challenges. Surfers have to learn how to read waves, build up paddle and core strength, be able to steer clear of other surfers in the water, and overcome big wipeouts, to name a few. We can all agree that it’s hard. Swimming and playing in the waves (close to shore) is a great way to open up a more playful mindset while you’re in the ocean. Laughing loud, jumping over and swimming under waves, body surfing in the shore pound, laughing loud all over again. These are just a few things that will not only teach you how to tap into a more relaxed and playful approach to surfing, but will also build your confidence in reading waves and being underwater.
Just breathe
Although this one’s a no brainer, it’s hard to remember to just breathe when you’re amidst the chaos! Deep, slow breaths will calm your nerves and get you re-centered. Try taking a few deep breaths every time you reach the outside and have a chance to sit up on your board. This will help to get rid of any panicky feelings you have and put you back in the zone. Try to make this a consistent practice.
We hope these simple tools help you calm your nerves and tap into the joy of surfing and ocean-play. If you try one of these tools and it works, we’d love to hear your story! If you have other practices that have worked for you, we’d love to hear about those too.
Want more? Check out our video collection and develop your own holistic surf practice by clicking here.
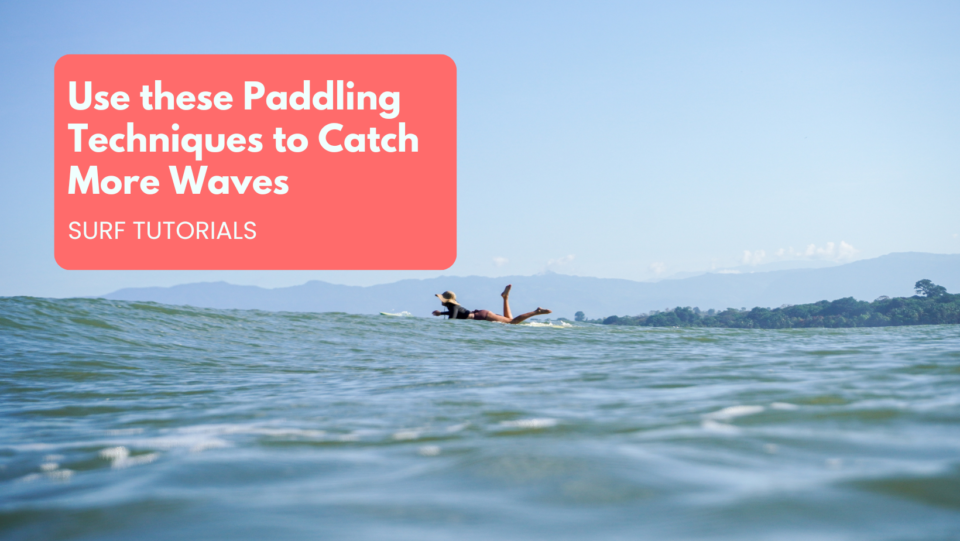
Do you ever find yourself paddling for a ton of waves only to actually catch a few? Or do you find yourself feeling off-balance and slow while you’re paddling out? A few years back we made a paddle tutorial that may help you to improve your technique. It’s short, sweet, and right to the point!
The video below covers a few tips and techniques that will help you improve on the strength and length of your stroke, as well as your balance and control. It also includes a few things to avoid doing while you’re paddling.
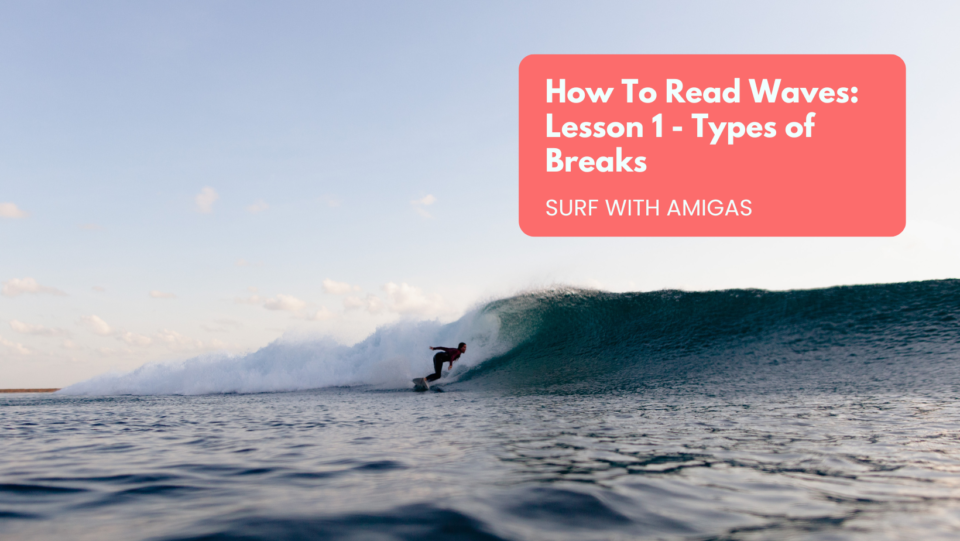
The first thing a new surfer wants to learn (after they’ve learned the very basics of how to stand up on a wave) is how to “read” waves. We practice this in-person during surf sessions at our women’s surf and yoga retreats, and while we wish there was a secret password to unlocking this mystery that we could easily share with you, it’s actually a complicated skill to learn which takes years to grasp and a lifetime to master.
Want to watch a video about how to read waves? CLICK HERE!
When you think about it, reading waves is actually like predicting the future. You have to look at a lump of water and be able to anticipate what it’s going to look like in 5, 10, 15 seconds and then position yourself accordingly. Not an easy task! But, there are some shortcuts and tips that we can share to give you a jumpstart. This is the first lesson in our series, so read on to learn more about the different types of waves. If you want to get the full experience, join us on a retreat to have these features pointed out to you in person!
How do waves work?
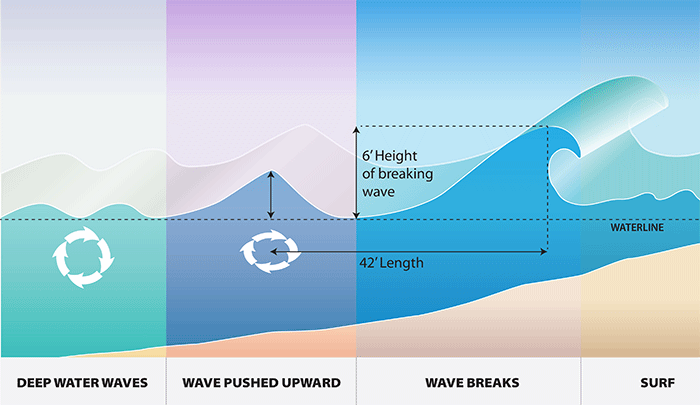
Have you ever been watching surfers from beach thinking “man, they make that look so easy” or “why didn’t he go for that wave?” If you’ve never tried surfing it’s easy to think it looks like a paddle out, surf a wave cycle on repeat. If you have surfed before, you are aware there is much more to surfing than that and 90% of your time in the ocean is spent either paddling (out, over, in, for a wave, to avoid a wave you don’t want) or sitting on your board studying the horizon looking for a wave to ride.
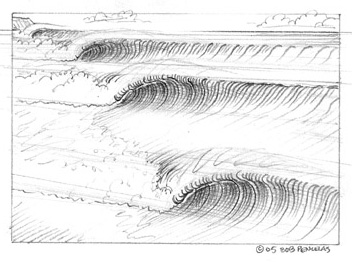
To start with the very basics, here’s a graphic showing how waves work. Wind blows over the ocean surface pushing surface water up into waves. The wind-blown waves will travel on indefinitely until they encounter a shallow bottom surface, which slows down the bottom part of the wave, causing the top part of the wave to topple over and form a breaking wave.
The abruptness of the change in bottom contour affects the power of the breaking wave. Imagine yourself jogging. You trip over a speed bump and slightly topple over but are able to keep running. This is a wave encountering a gradually sloping bottom or very small sandbar or with a high tide. Now imagine you trip over a curb. Your fall will be more complete and harder. This is what happens at a medium tide. Finally, imagine tripping over a waist high wall – you would double over with force. This is what happens at low tide or when a wave hits a shallow reef sitting in deep water.
How fast you’re running will make a difference as well. So imagine the speed of your run to equal the strength of the swell, and the thing you trip over to be the ocean bottom contour, whether it’s rock, reef, or sand.
Being able to read waves is one of the most difficult skills to master in surfing. Here is the secret to reading them.The way you approach waves changes from wave to wave, day to day, and surf break to surf break. Only time and experience can get you to know when you should paddle for a wave or skip it. There are many aspects to reading waves but starting with the very basics : knowing what kind of break you are surfing is step one to gaining the knowledge of wave reading. Ok, onto the different types of bottom contours…
three main types of breaks
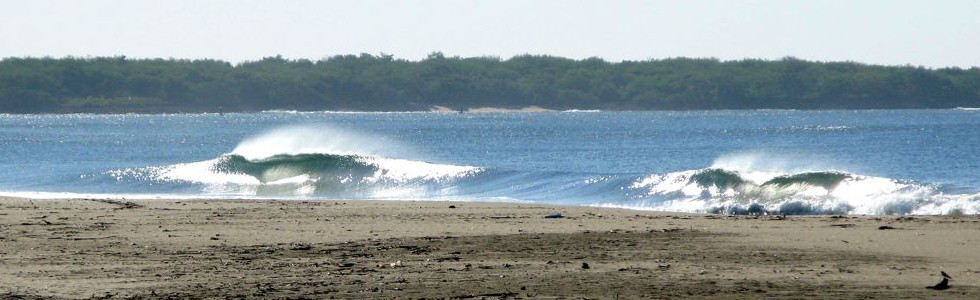
1. Beach Breaks:
Beach breaks are waves breaking over a sandy bottom. They are usually the most consistent types of breaks – meaning there would be surf-able waves on most days – since little swell is needed for waves to break over the sandy bottom.
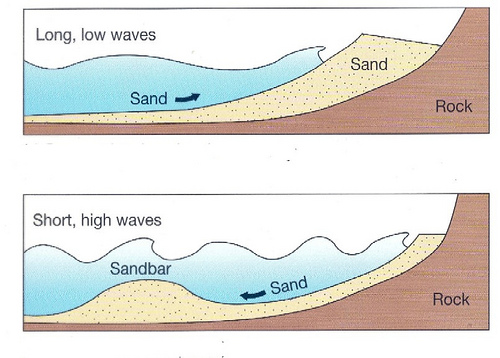
Here’s a diagram of how a sandbar forms. Wave action pulls sand off the beach to form a bar.
Waves break on sandbars that form on the ocean floor due to currents and wave action. The sand bars can shift with different storm and swell patterns which means that waves don’t break in the same spot every time.
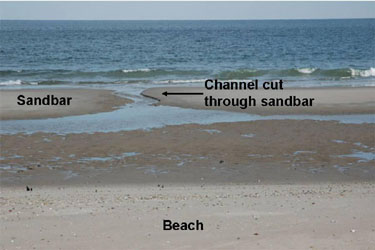
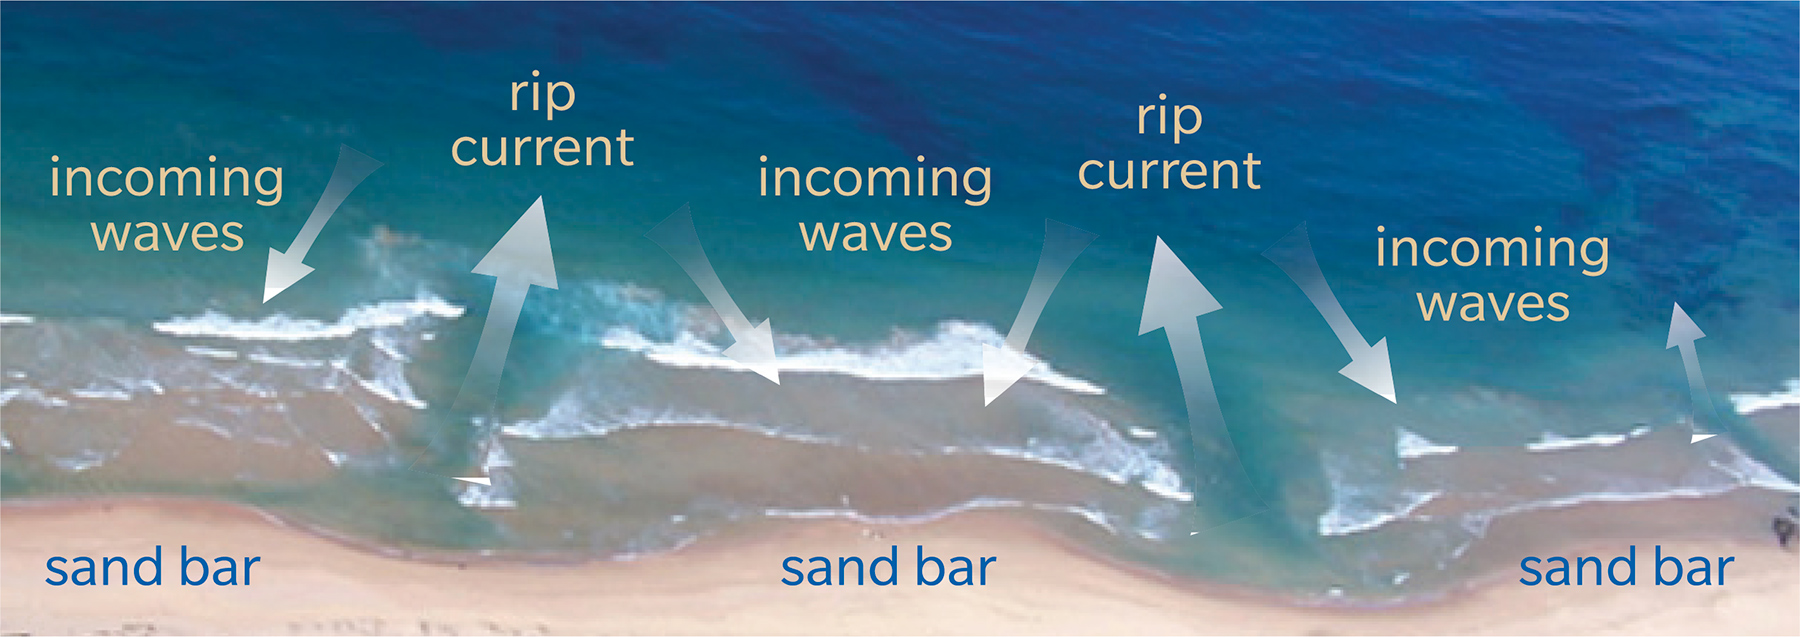
With all the water coming towards shore via waves, that water needs a way to get back out to sea. This is how riptides form.
In the photo above you can see a low tide beach scene. The sand bar is visible along with a break in the bar caused by the water heading back out to sea that pulls sand with it. Since the water is deeper over the break in the bar, waves will be less likely to break there.
A rip current is a great place to choose to paddle out. Not only is the current going to take you out to sea, you will also likely have fewer waves coming at you to have to duck-dive or turtle-roll. When sitting in the lineup looking for a wave to catch, you want to avoid sitting in a rip tide for the same reason : waves will be less likely to break there and those that do will usually be choppy from all the outrushing water.
If it has been a long time since a swell or storm has broken up the sand bottom then the sand can settle and flatten which means that breaking waves will be more likely to close out – meaning to break all at once without any opportunity for a long ride.
Other factors such as piers, jetties, and storm drains may dictate what may happen to a sand bar and also where the rip tides form. Those factors can create a more consistent sand bar which is why you often see surfers crowding these areas.
Beach breaks are great for learning because there is little to worry about in the way of obstacles such as rocks and reefs. Waves will be breaking in multiple places which helps spread out the crowd. Also the waves are usually consistent, giving beginners plenty of tries to get the hang of surfing and more advanced surfers plenty of waves to practice on.
A reef break is a surf spot that has anything from smooth rock to razor sharp reef beneath the breaking waves. Since the reef doesn’t move around, these waves will break in generally the same spot and will be more predictable than a beach break.
Often times waves breaking over a reef have more power because when the swell energy approaches the reef, the abrupt change in bottom (material or depth) creates a more hollow wave. At lower tides reef breaks can be dangerous if the reef is shallow (note photo in the beginning of this section of dry rock visible very close to the surfer!).
Reef breaks are more predictable than beach breaks. The takeoff spot rarely varies very much so you can study where the waves are breaking, look towards the beach, choose a lineup marker (palm tree, hotel, lifeguard tower etc.), and then paddle directly to “the spot” each time, knowing that when the waves come, you’ll be in a good spot to catch one. Reef breaks typically have a consistent channel allowing you to paddle out easily. Since the takeoff spot is so predictable, crowds can often be more of an issue at a reef break than they would be at a shifty beach break.
While the potentially sharp and hard bottom of a reef break makes these spots more suited to more advanced surfers, there are some user-friendly waves that do break over reef. If you are a beginner planning to tackle a reef break, it’s a good idea to have a friend or someone like Surf With Amigas point you in the right direction to help you find the channel and avoid getting stuck inside on the reef.
If you are used to surfing beach breaks reef breaks are a great way to switch it up. They will force you to be more aware of your surroundings (shallow bottoms, line ups on the beach) and often offer better wave shape with the potential for a longer ride so you can practice new maneuvers in your surfing and have more time to think about what you’re doing.
Point breaks are the quintessential wave you see in a surfer’s notebook doodles. The longest waves in the world are point breaks. The most well formed points come off of peninsulas that jut out into the ocean or some other feature underwater causing sand to build up to form very very long waves. They can have rock, reef, sand bottoms or a combination of rock or reef and sand (the rock or reef would act to hold the sand in place). Swell energy bends and peels along the peninsulas forming long, sometimes “perfect” waves.
The waves forming off these points break in the same direction, so they are either all breaking left or all breaking right. Like a reef break, the waves will typically begin breaking in the same spot and are therefore relatively easy to predict.
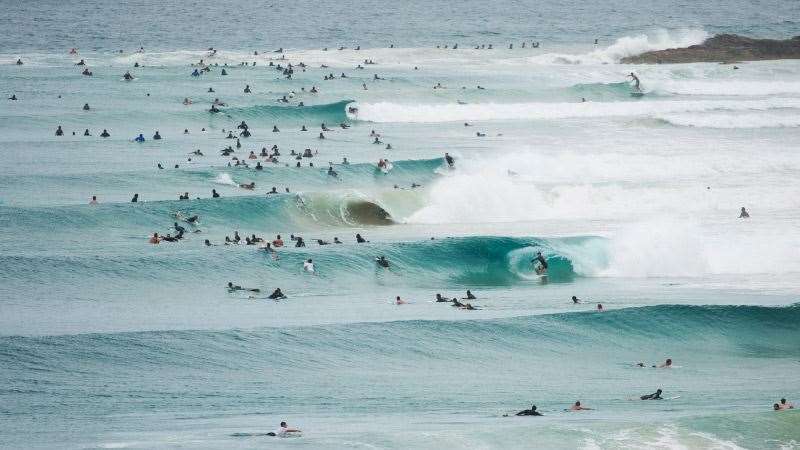
Point breaks are often times crowded due to their tight takeoff point and very long high quality rides. On a good day, riding a wave from the peak may turn into a slalom course with the surfer on the wave having to maneuver around surfers waiting for their own waves, paddling out, or trying to drop in. Unfortunately, point breaks are usually tucked alongside headlands that can block swell energy making them more fickle and require a larger swell than either reef breaks or beach breaks to make them work.
Pavones is the second longest left point break in the world and if you join us at one of our Southern Costa Rica Retreats you will have a chance to surf the zone! Our retreats in southern Morocco are at an incredibly long right point break- great for longboarding.


 2. Reef Breaks:
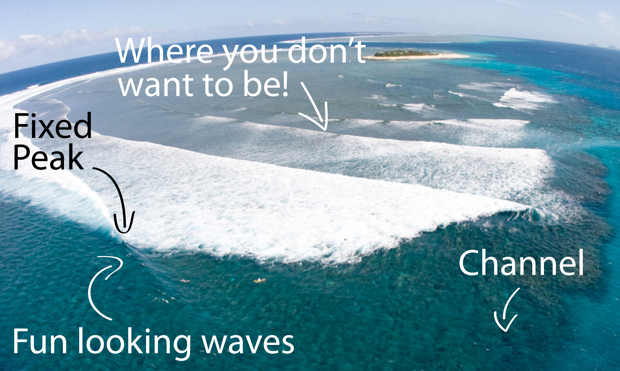


 Point breaks are often times crowded due to their tight takeoff point and very long high quality rides. On a good day, riding a wave from the peak may turn into a slalom course with the surfer on the wave having to maneuver around surfers waiting for their own waves, paddling out, or trying to drop in. Unfortunately, point breaks are usually tucked alongside headlands that can block swell energy making them more fickle and require a larger swell than either reef breaks or beach breaks to make them work.